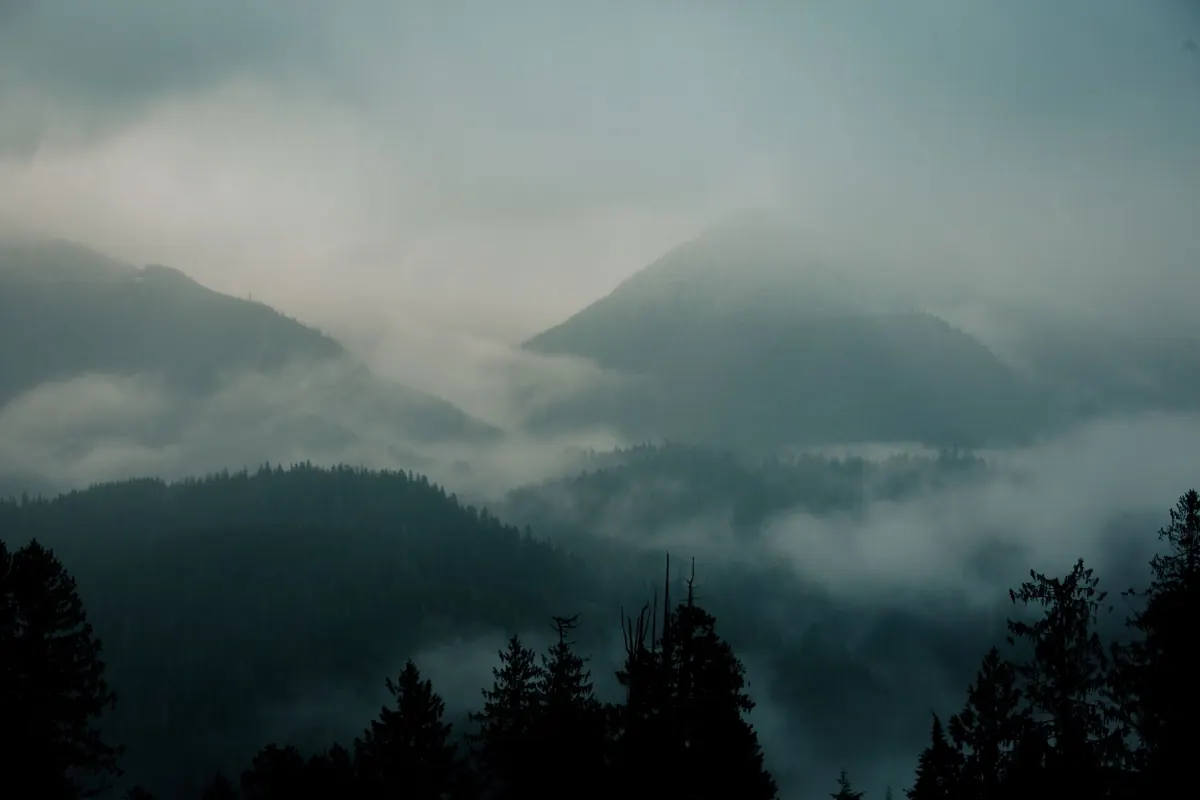
The first sign is usually the temperature. You drive down a lane with the window open and the air turns suddenly colder at the bottom of the hill, and by the time you reach the church the tower has gone soft and grey. Cotswold valley mist rarely lasts more than an hour after sunrise, but in that hour you get light and separation that no other conditions give you. Here is how to find it, expose it and photograph it without falling in a stream.
Read the Weather, Then Get There Early
Valley mist is a straightforward piece of physics. On a clear, calm night the ground radiates heat away, the air above it cools, and that cold air slides downhill and pools in the valley bottoms. If the dew point sits within a degree or two of the air temperature by dawn, the moisture in that pooled air condenses and you get fog. High pressure, light wind, damp ground and a clear night are the ingredients. Wind is the killer; anything more than a gentle breeze mixes the layers and the valley clears.
Autumn is the classic season, from late September into November, when warm days follow cool nights. Calm spring mornings after a wet spell work too. Watch the forecast the night before, set an alarm you will actually get up for, and aim to be in position forty minutes before sunrise. Mist often thickens just after first light and then burns off from the edges, so the best twenty minutes can arrive without warning.
Where the Mist Sits
The Cotswolds gives you two useful shapes. The steep escarpment valleys west of Cirencester and around Stroud — Slad, Sheepscombe, Cranham, Painswick — hold deep, wooded fog that sits low and stays put. The gentler river valleys of the Coln, Windrush, Evenlode and Churn spread mist wide and thin across water meadows and pastures, which suits wide, quiet compositions.
In both cases the trick is to stand above the fog rather than inside it. Ridges and viewpoints give you the bowl of white with church towers, tree lines and field barns poking through. Being on the valley floor usually gives you grey nothing.
A long lens is your friend here. At 100–200mm the ridges compress into stacked bands of grey and white, each one lighter than the last. A wide lens works when you want the mist as negative space around one strong shape: a gate, a single tree, a spire, a sheep on a bank.
Exposure: Keep the Mist Bright
Your meter wants to turn a bright, low-contrast scene into a mid-grey average, and that is exactly what mist should not be. Underexposed fog looks like dirty washing. Add exposure compensation, usually somewhere between +0.7 and +1.5 EV, and check the histogram rather than the preview: you want the brightest mist close to the right-hand edge without the sunlit highlights clipping.
- Mode: aperture priority, or manual once the light settles
- Aperture: f/8 to f/11 for depth through the layers
- ISO: 100–200 on a tripod, and don't be afraid to raise it if you are hand-holding in a wood
- Exposure compensation: +0.7 to +1.5 EV as a starting point
- White balance: daylight rather than auto, and shoot raw — mist records cool and blue, and auto white balance tends to swing between frames
Where the sun breaks through, bracket. A three-frame set a stop apart costs you nothing and gives you a choice later between a soft, luminous frame and one with real detail in the backlit trees.
Focusing When There Is No Contrast
Autofocus needs edges, and fog removes them. Expect hunting, especially with older bodies or when you point at a bank of white with nothing in it. Two reliable fixes: use a single AF point on the most contrasty thing in the frame — a gatepost, a stone wall, a tree trunk — and recompose, or switch to manual focus and use magnified live view. Focus on something solid a third of the way in and let depth of field and the mist itself take care of the rest. Nobody expects the far ridge to be sharp; the atmosphere is the point.
Working the Light
When the sun climbs into the mist it becomes a soft disc you can shoot straight into, and the light shafts through roadside trees are worth the wait. Use your lens hood, shield the front element with your hand, and accept a little flare as character. Look for the one patch of colour that survives: beech leaves, a red phone box, a blue tractor, a high-vis jacket on a walker. Those small anchors stop a foggy frame from becoming a grey rectangle.
Kit, Cold and Condensation
Fog is wet air, and your front element will dew up. Keep two cloths in a zip pocket, one for the lens and one for your hands, and blot rather than scrub. If your camera has been sitting in a warm car, the glass will fog from the inside when you step out; let the bag cool in the boot before you set off. Cold also drains batteries, so carry spares in an inside pocket where your body keeps them warm. Rubber feet on the tripod for wet limestone, spikes for grass, and a rain cover even when it is not raining — trees drip for an hour after dawn.
Staying Safe in the Fog
Most mist photographs are taken from verges, gateways and ridges, and the journey is the riskiest part. Drive with dipped headlights, leave a bigger gap than usual, and never stop on a bend or in a passing place to grab a shot. Lay-bys and field gateways are worth the extra two minutes of walking.
On foot, the ground under mist is greasier than it looks. Wet limestone, wooden stiles and frosty boardwalks all catch people out, so wear boots with real tread and take a walking pole if you are starting in the dark. Riverbanks at the valley floor can be undercut and invisible in long grass; keep back from the edge. Cattle with calves and rams in autumn deserve a wide berth, and gates should be left as you found them.
Phone signal is patchy in these valleys. Tell someone your route and roughly when you expect to be back, and send them a pin of where you parked. Pack a head torch with spare batteries, a warm layer and a flask. If you are walking alone in remote places, that message home is the single most useful piece of preparation you can make.
A Checklist for the Next Foggy Morning
- Check the forecast the night before: clear, calm, high pressure, and a dew point close to the air temperature.
- Charge batteries, clear cards, and pack cloths, torch, gloves and a spare layer.
- Mark a viewpoint and a fallback on the map so you are not deciding at 6am.
- Arrive forty minutes before sunrise. Set +1 EV, daylight white balance and a tripod.
- Focus manually on something solid, then work the frame: vertical, horizontal, long lens, wide.
- Move twenty paces. The best composition is rarely where you first stopped.
- Back up the cards the same day, while you still remember which lane you were standing in.
Mist rewards the prepared and punishes the late. Be in the valley before the light arrives, and you will come home with two or three frames worth keeping — which, on a foggy morning in the Cotswolds, is a very good return.
Photo: Wilson Rodriguez / Pexels